 |
|
|
 |
|
|
|
|
|
|
|
|
|
|
|
|
|
|
|
|
 |
 |


August 1999 Tech Tips
TIP #1 TIP #2 TIP #3 TIP #4 TIP #5
TIP #1 - ![]()
I BOUGHT A
CO2 “FILL ASSEMBLY” BUT CAN GET ONLY 3-4 OZS. AFTER FILLING.
| To date several companies are selling CO2 fill assemblies with incomplete instructions and some with no instructions whatsoever. I am not giving you the full instructions, but will fill two consistent gaps in instruction manuals. First is to insure that the tank you are using to fill off of has a siphon/dip tube. This a piece of tubing or hose inside the large container (usually either a 20lb. or 50lb. Tank) that reaches to the bottom of said tank (where the liquid is) to draw the liquid out. If you do not specifically ask for a siphon tube on a 50lb. tank they will not give you one, and a siphon tube on a 20lb. is pretty much unheard of unless you have it installed. This should be done by a professional ala “kids and adults do not try this at home”. The second thing left out that causes “short fills” in most “manuals” is to prime or chill the tank you will be filling. The quickest way is to put the 3-4 oz. in that will go without chilling or priming and then immediately bleed it back out that will generally chill it quite enough. Be certain to turn the tank being filled upside down to allow the liquid to run out or else dry ice will form inside (that’s not good). Some penny pinchers would rather chill the tank via a refrigerator, freezer, or ice chest. The first two are OK but I do not recommend putting CO2 container in an ice chest --- it is possible to have the water from the ice seep into your tank (that is bad). Once properly chilled the siphoning from one to the other goes well enough to get a “complete” fill. | 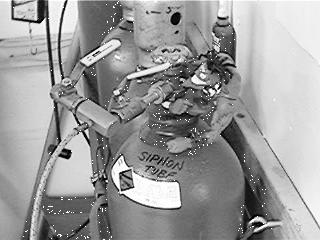 YOUSE GOTTA SUCK THE LIQUID OUT ---- NOT JUST BLOW GAS! |
TIP #2 - ![]()
THE VELOCITY ON MY ANGEL IS LOW AND WON’T ADJUST UP AND/OR DROPS OFF WHEN I RAPID FIRE.
| The most common cause for this is the output pressure from your air source is not set high enough. Some angels require as much as 900 psi going into them to maintain desired velocities. However there is another possibility as well. When you open the breech block to remove the bolt you will notice an opening going into the lower half of the mainbody. Inside that opening you will see at one end a brass piece and at the other a stainless stem. The brass piece is the head/striker of the pneumatic ram, when fired it zips across that opening to the other end striking the stem opening the valve allowing the air to pass through the bolt firing thus firing the ball and to grandmothers house we go. After considerable use and/or extremely sandy or dusty conditions that area the head of the ram must pass through can get “gunked” up. That can cause the ram to drag, losing some of its umph needed to open the valve. The best way to clean the area requires complete disassembly of the gun, which requires special tools. I recommend giving it to an expert for this. But you can get a lot of it out using q-tips or holding the gun upside down and carefully spraying a degreaser into the opening. When done cleaning I recommend squirting some Dow 33 grease down in the very bottom of the opening. | 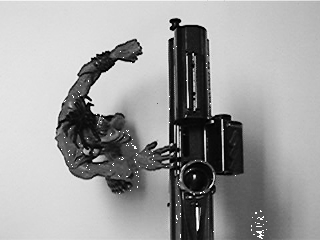 DIS WHERE I HIDE ALL MY DIRT AND PAINT ----- THINK IT'S A GOOD PLACE? |
TIP #3 - ![]()
I JUST
BOUGHT THE NEW BUSHMASTER 2000 AND IT FIRES ----- BUT THE BOLT DOESN’T
MOVE.
| This can occur after the pin that holds the bolt in has been removed for cleaning/squeegying. It is merely a matter of positioning the bolt correctly and pushing the pin all the way home. When removing the bolt I recommend leaving the air on, but switching the electronics off. Pull the pin and remove the bolt ---- when you look down through the slot that pin rides in ---- you will see a stainless piece with a slot. With the air on it will be drawn all the way to the rear of the slot (air off and it could be anywhere in the slot). When you replace the bolt it has to “snap” into the slotted area of said stainless piece. That is why having the air on helps you to know where it goes is all the way back (so you may do it without looking). Be certain to snap the pin down to the point where the shoulder of the pin is virtually touching the slot. You should also note that it is possible to insert the bolt upside down. There a port half way down that must face toward the bottom of the gun to allow the air to pass through to the ball. | 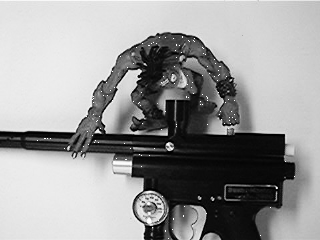 WITH DIS ONE YOU GOTSTA LINE IT UP RIGHT AND SNAP IT TIGHT! |
TIP #4 - ![]()
THE VELOCITY
ON MY STINGRAY II WON’T GO VERY HIGH.
| Once the allen screw adjustment through top of the gun has been adjusted all the way out there are still a couple of things you may try. The first is to shim up the mainspring. I recommend using 3-4 rings of another mainspring that has been cut down. Place the short spring over the guide rod (the end towards the back of the gun) and then put your old spring on top of that. The other thing to look for is that the stingray II barrel is very short and a large bore. Ask for the largest bore sized paintballs available when buying your paint. Note that even trying all these tricks may not get your velocity over 250 fps. You can try a different barrel, but that is the most velocity you can achieve in some cases. Note: always remove the air source on a stingray before disassembly! | 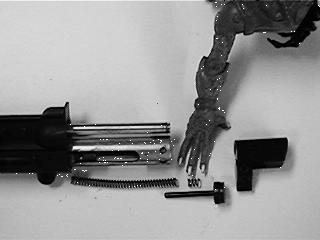 ME LIKES TO SHOOT JUST AS FAR AS THE OTHER MONSTERS. ERICK SEZ DIS SPRANG SHOULD HELP. |
TIP #5 - ![]()
THE VELOCITY
ON MY RT SEEMS LOWER ON MY FIRST SHOT.
| This is not a fig newton of your imagination. When you turn the output pressure on your air source up higher (say 800-900psi) you get a much more “reactive” trigger, however that can have more of an effect on your velocity. I have found that keeping the output pressure down around the 650-700psi range makes for the tightest range in velocity (usually no more than 5fps). I believe that the factory has a graph and other literature to help explain this even better. | 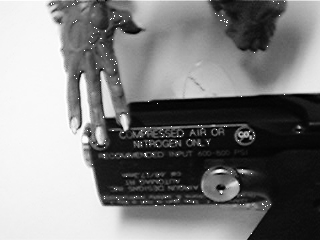 SOMEBODY TELLS ME WHAT DAT SEZ. ME DON'TS HAVE MY READIN GLASSES ON. |
Erik Hoffman is not to be held responsible for any injury or equipment damage. Our recommendation is that all paintball equipment repair or modification should be handled by a competent and qualified airsmith or by the manufacturer of said product. Anybody using these tips should take great care doing anything to and/or operating any paintball equipment.